Tutorial Level: beginner - intermediate
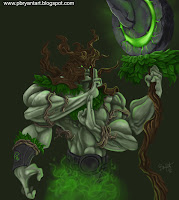
Every finished painting or drawing starts with a strong foundation. When I was first teaching myself to draw I would copy my favorite comic book characters over and over. More often than not, my image would appear flat and stiff looking. Why? I didn't understand how the "structure" was built. I was trying to build a skyscraper from the outside in rather than from the inside out. This tutorial covers the the sketch phase using line and basic shapes in order to build up a solid foundation underneath all of the final details and rendering. Please feel free to leave any questions/comments below at the end of the post.
Basic Shapes
When I was first learning about basic shapes, the most important thing that I realized was to NOT use circles,squares,and rectangles. But rather spheres, cubes, and cylinders. The difference? Spheres and cubes are 3D objects. I noticed a huge difference immediately when I built my character using 3D objects. My image was no longer flat. When we draw on a flat 2D surface, visualizing our character as a 3D object provides the illusion of space and proper structure.

Lets Sketch
The first thing to establish is a line of action to suggest movement. More often than not, this is done by drawing the spine of our character. Follow that up with drawing an egg shape for the head with a line to suggest where the eyes will go. Then another line for the shoulder line.

Next up is to give the character some volume by drawing the torso with a tube type shape. Some artists prefer to use cubes. I sort of combine a cylinder and a cube. As long as its a 3D shape you're fine.

Now lets take a look at our first 2 steps pieced together.

Our torso and head suggest any movement and mood of our character. That's important. Now lets add some limbs by sketching in some quick lines.

Notice I'm not getting detailed at all. Just keep things loose and be patient. All of the detail will come but they meant nothing without these important stages. Now I add some more 3D shapes on top of the lines I just sketched in.

Lets erase some unnecessary lines and have a look.

Side by side comparison.

You can do this next step for practice if you wish. Since I'm doing this sketch in Photoshop, I make a layer beneath my drawing, fill it with grey, and quickly add some shading and highlights to it. You can see that our sketch has some volume and it isn't flat. Sweet!

Adding Detail
Up until this point you've conquered the most important part of the sketch phase. It's loose, simple, and has depth. Now you can take a piece of tracing paper, lay it on top of your sketch and start playing around with some detail using your basic shapes as a guideline. Or you could just keep drawing on your same piece of paper.

When I remove the underlying model that we built you can still see how a lot of the anatomy that was added is very influenced by the basic shapes that helped build this up to this point.

Whether you are using a piece of tracing paper or drawing on a separate layer in Photoshop, just keep adding as much detail as you would like until you're happy.

No matter how much detail you add, stay true to the original, loose, simple sketch model that started it all.

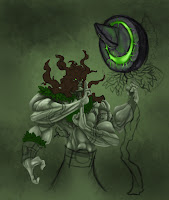
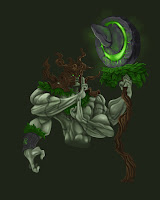
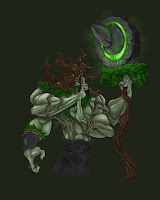
Painting W.I.P.'s
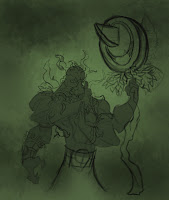
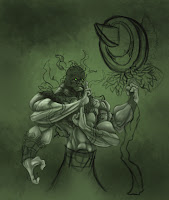
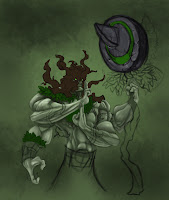
Since I knew I was going to paint this image I didn't bother tightening up the sketch any further because I had all the information that I needed. These are just a collection of some of my steps. How I actually paint is covered in the next tutorial Getting Started. I hope you guys found this tutorial helpful. If you have any questions or comments please leave them below. Have a great day and happy drawing!


Wow! That's a really nice tutorial prb! :)
ReplyDeleteHey man great tutorial and detailed info on the drawing aspect, especially the 3D tips. But I noticed you don't have any very detailed painting process tutorials only broad ones. I would like to request a detailed painting process, thanks.
ReplyDelete@razor- thx man. i keep tryin to improve my tuts.
ReplyDelete@Azmar- thx. yes the 3D aspect really helps. as far as a "detailed" process, i think my process might just be a simple one. i use one brush,no filters,no channels, no blur or smudge tools. i just simply paint as tho i had markers coloring on paper. but if there is something very specific u want to know about just ask here.
My ONLY problem is :
ReplyDeleteI drew my figure (its kinda like your figure, but its a little different) with pen and paper, I scanned it to my PC and... well.. now im kinda stuck.
I dunno what to do. Drawing it again in "Sample under paper" isnt working, My paper arent so thick so i cant see very good through them.
In my PC its hard to line everything again and my hand is just very unstable when im using photoshop / Marcomedia flash.
What should i do?
Drawing in PS takes some practice and I only recently started doing it.I would stop by your local Staples to get some tracing paper. Its pretty cheap http://www.staples.com/office/supplies/StaplesSearch?searchkey=tracing+paper&storeId=10001&catalogId=10051&langId=-1&fromUrl=home
ReplyDeleteYou can trace over your original sketch in ink so u get some nice dark lines when u scan it in
hmmm i like your work and your tutorials give good advice for most artists
ReplyDeletegreat! your are a great artist ;D
ReplyDeletethx michael. i'll try to do some video tutorials soon.
ReplyDeleteDamn i realy want a career as freelance artist and then (if im lucky) continue to work as Art/Animation For a game company (Bioware, Blizzard, Etc.) i enjoy drawing but i got 2 major problems. 1. im so hypnotised by gaming that Games like BF Sucks all my time (i kno i could just stop using all my time on gaming but ive done it pretty much all my life and im kinda addicted) and 2. I have never had a talent for drawing but sometimes my drawings are pretty good but most of the the time i mess up in sizes and shapes. you tutorial has inspired me to try practicing more and try youre tips. if you have any advice for me i would gladly take them. (i kno i got very little Self-discipline but im working on it).
ReplyDeletehey Blizzice i'm glad you liked the tutorial and found it inspirational. as for video game addiction, youre not alone man it happen to me too with WoW for a looong time. kicking the habit is hard but it can be done. i'll give you some advice that someone gave me years ago: "the opportunity to play video games, party, or goof around will always be there but the opportunity to do something special with your talent will not be. so take advantage of your talents and do something great with them."
ReplyDeletegood luck!
Ty for the adviced hope i can break loose of the chains of gaming :D. Btw i would realy apreciate if you made a tutorial for 4 legged creatures since i tend to draw them alot. Again Ty for the advice and happy drawing :).
ReplyDelete